

Populate form lists and drop-downs from a Webflow CMS collection. You control the filtering and sorting of your own list content.
Webflow's collections are great, and so is its forms design capabilities - however at present they do not work together. As of Sept 2021, Webflow still doesn't allow you to connect a FORM SELECT element to a collection, which makes it difficult to do things like...
The web is dynamic, and we want our dynamic data to be part of our customer experience.
Now you can.
Webflow does not allow you to upload script files into its hosting environment, therefore the easiest way to embed Sygnal Webflow Utils (SWU) is by using a Content Delivery Network (CDN).
Throughout this documentation, I'll use that approach and provide you with the URLs you need to include on your webpage as script references.
See installation notes for more advanced information on how to specify versioning, and where to place the files.
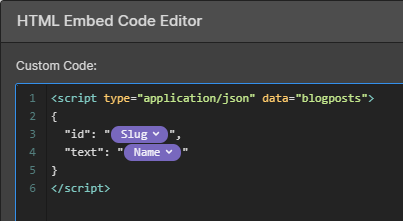
Here's how to implement this feature on your own Webflow site.
<script type="application/json" data="blogposts">
{
"id": " YOUR ID HERE ",
"text": " YOUR TEXT HERE "
}
</script>

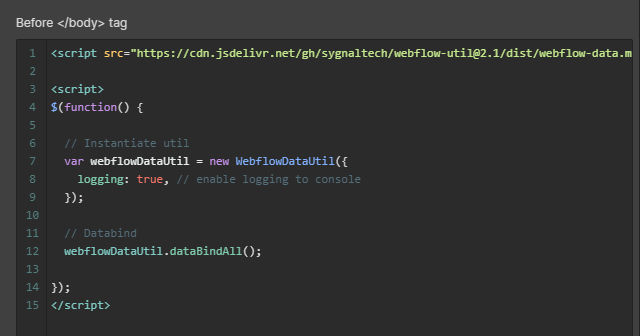
Open the configuration settings for you page and scroll down to the bottom, where custom code is added to the page. The name of this section is Before </body> tag.
Paste in the following script;
<script src="https://cdn.jsdelivr.net/gh/sygnaltech/webflow-util@2.1/dist/webflow-data.min.js"></script>
<script>
$(function() {
// Instantiate util
var webflowDataUtil = new WebflowDataUtil({
logging: true, // enable logging to console
});
// Databind
webflowDataUtil.dataBindAll();
});
</script>
It will look like this-
When you view your running website, the javascript will run, and you will see the data-binding in action.
Make sure to check out the Github repository if you're looking how to do fancier stuff.
This feature requires jQuery, which is already part of all Webflow-hosted sites.
This library requires jQuery, which is already part of all Webflow-hosted sites.
Here's how to implement data-binding in your own Webflow site.
<script type="application/json" data="blogposts">
{
"id": " YOUR ID HERE ",
"text": " YOUR TEXT HERE "
}
</script>
Open the configuration settings for you page and scroll down to the bottom, where custom code is added to the page. The name of this section is Before </body> tag.
Paste in the following script;
<script src="https://cdn.jsdelivr.net/gh/sygnaltech/webflow-util@2.1/dist/webflow-data.min.js"></script>
<script>
$(function() {
// Instantiate util
var webflowDataUtil = new WebflowDataUtil({
logging: true, // enable logging to console
});
// Databind
webflowDataUtil.dataBindAll();
});
</script>
It will look like this-
When you view your running website, the javascript will run, and you will see the data-binding in action.
None known.